
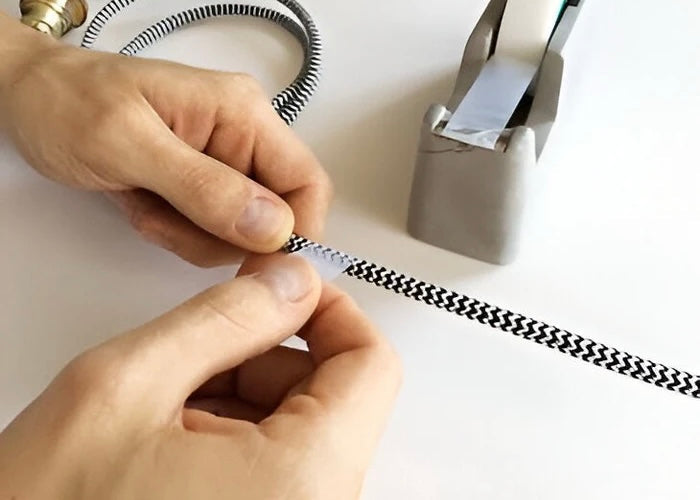
4 safe and easy ways to shorten lamp cords
Goodbye to tangled cables!
Do long, hanging lamp cords clutter up your area, create tripping hazards, or just look messy? You're not alone! Fortunately, shortening a lamp cord is usually a doable task. Even if you're new to home improvement projects, this guide offers four different techniques, ranging from simple wraps to precise cuts, to help you achieve a cleaner look and a safer home environment.
Table of Contents
-
Why should you shorten a lamp cord?
-
Know the anatomy of your lamp cord
-
Critical Safety Measures: Get Ready Before You Begin!
-
First method: cut off the plug and reattach it for permanent shortening.
-
Method 2: Simple & Reversible Cable Shortening Device Method
-
Method 3: Replace the entire cable (best if damaged or exact length)
-
Method 4: Beautifully loop or braid the extra cable (no cutting required)
-
Choose the best course of action for yours
-
Frequently asked questions (FAQs)
1. Why shorten a lamp cable?
Shortening a lamp cord that is too long offers useful benefits that go beyond aesthetics:
-
Increased security: Reduces tripping hazards, especially in homes with children and pets or in high-traffic areas.
-
Neater appearance: Cleans up visual clutter for a neater, tidier space.
-
Cable protection: Prevents excessive use of the cord from causing it to be walked on, pinched, or damaged.
2. Understand the anatomy of your lamp cord
Knowing the basic parts of a cable helps modify it:
-
Leader: Usually two copper wires that carry the electrical current. One is "live" (carries power to the lamp), and the other is "neutral" (carries power back to the source). For safety there is occasionally a third "ground" wire.
-
Insulation: Typically made of PVC or rubber, insulation is a protective layer that covers each conductor wire to prevent short circuits and electric shocks.
-
Outer shell: The outer sheath covers the insulated wires to protect them from environmental influences, moisture and physical wear and tear. Although more commonly found in specialty cables, some cables may have braid or shielding to protect against electromagnetic interference (EMI) or fillers to stabilize their shape.
3. Extreme Security Measures: Before You Begin: Read!
Working with electricity requires care. Safety always comes first:
-
Disconnect power: ALWAYS UNPLUG THE LAMP FROM THE WALL SOCKET BEFORE BEGINNING ANY WORK THAT INCLUDES CUTTING, REMOVAL OF INSULATION OR CORD REPLACEMENT (METHODS 1 & 3). It's not enough to turn off a switch.
-
Use the right tools: Use insulated wire strippers and cutting tools, among tools intended for electrical work. Check if their condition is good.
-
Wear protective equipment: Safety goggles protect your eyes from flying debris. If available, insulating gloves provide additional protection.
-
Work in a safe environment: Make sure your workspace is free of clutter, well lit and dry. Keep animals and children away.
-
Check the cables: Never work on a frayed, cracked, brittle or damaged cable. Replace it completely (Method 3).
-
Know your own limits: If you feel unsafe or uncomfortable, especially with the wiring connections, stop and contact a licensed electrician. First and most important is safety.
-
Check your work: Make sure all connections are tight and properly insulated before plugging the lamp back in.
4. Method 1: Cutting and reattaching the connector (permanent shortening)
This approach wires power from the existing plug—or a new replacement plug—after cutting the cable to the desired length.
Required tools are:
-
Security: Safety glasses
-
The preferred combination tools are wire cutters or wire strippers.
-
Typically a Phillips or flathead screwdriver, a screwdriver checks the screws in your connector.
-
To mark the cut, tape measure or ruler
-
Marker or tape
-
Optional, but recommended for reinforcement, is electrical tape.
-
New replacement plug (optional; if the old one is damaged or moldy)
Procedure:
-
PULL THE LAMP OUT OF THE Power plug! Check that it is not connected to the Power plug is connected.
-
Measure and mark accordingly: Calculate the final cable length required. Count from the lamp base to the Power plug. For flexibility, add a little extra wiggle room—a few inches. Clearly name the intersection point.
-
Cut the cable: Cut the cable at your mark, straight and cleanly with wire cutters. throw away the extra piece.
-
Prepare the connector by: Use the screwdriver to open the old connector if you are reusing it. Look at how the wires were connected—usually screw terminals. Loosen the screws and cut off the old wire ends. Familiarize yourself with the connections of any new plug you are using.
-
Cut the end of the cable: About 1 to 1.5 inches, carefully separate the two insulated wires within the outer shell. Remove about ½ to ¾ inch of insulation from the end of each lead wire using the appropriate setting of your wire stripper to expose the copper wires. Try not to scratch the copper.
-
Note Polarity (Very Important!): Typically lamp cords have polarity indicators. Search for:
-
A wire with small grooves or ridges along its insulation (usually the neutral wire).
-
One of the wires—usually the live wire—is smooth.
-
A wire may occasionally have print or a colored trace thread.
-
With polarized plugs, the wider pin corresponds to the neutral conductor and the narrower one corresponds to the phase conductor.
-
-
Make wire connections to the plug: Twist the exposed copper wires of each line tightly together. Wrap the hot wire clockwise around the appropriate screw terminal (usually brass colored, connected to the narrow connector pin) and then tighten the screw. Wrap the neutral wire clockwise around its screw terminal (usually silver, which connects to the wider connector pin) and tighten. Make sure no loose or touching wires reach the other terminal.
-
Reorder: Close the socket casing so that if the plug has a clamp, the cable is clamped tightly to avoid strain on the connections. Tighten all case screws.
-
Test: Plug in the lamp and check it.
5. Method 2: Simple and reversible cable shortening device
For people who don't want to cut the cord, this is the easiest and perfect approach. It bundles the extra length neatly with a little gadget.
Required tools are:
-
Lamp cord shortening device (various styles available: coil, cleat, box)
-
Tape measure or ruler (optional, for accuracy)
Procedure:
-
Choose your device: Choose a cable shortener that suits your cable thickness and aesthetic taste.
-
Determine the excess length: Choose the level of cable hiding you want.
-
Wrapping or coiling: Follow the device's specific instructions and wrap the excess cable either inside the storage box or around the device's coil or terminal block. Depending on where you want to place the shortener, start wrapping from either the lamp end or the socket end.
-
Safe (if applicable): Some extension cords have covers or clips to keep the cord neat.
-
Position: Place the extender either near the Power plug or discreetly behind furniture.
6. Method 3: Replace the entire cable (preferably if damaged or exact length)
Replacing the entire cord is the best course of action whether your current cord is damaged or you want a specific color, style, or exact length. This is more involved and requires basic knowledge of lamp wiring.
Instruments required:
-
Safety glasses
-
Wire cutters or wire strippers
-
Screwdriver (Phillips, slotted, possibly socket wrench)
-
New lamp cord (correct gauge, length and type) - Make sure it has a plug; otherwise, purchase a separate connector.
-
Wire sleeves (if internal connections require)
-
Insulating tape
Steps:
-
PULL THE LAMP OUT OF THE Power plug!
-
Choose another cable: Normally 18 AWG for standard lamps, make sure the wire diameter (thickness) of the replacement cable is suitable for your lamp in the required length. Check the old cable markings if possible.
-
Accessing the wiring for lamp lighting: To see where the power cable is connected internally, carefully disassemble the lamp base or socket area. Photos or notes of how the old cables are connected—i.e. on the lamp base screws, wire nuts—are invaluable.
-
Disconnect old cable: Loosen screws or unscrew wire nuts to disconnect the old wires from the lamp's internal wiring (usually the lamp socket). Completely remove the old cord, perhaps pulling it through the lamp base.
-
Prepare for a new cable by: If the new cable does not have pre-stripped ends, cut about 1/2 inch of insulation from the wires at the end that goes into the inside of the lamp.
-
Connect the new cable: Connect the new cable's wires to the lamp base terminals or internal wiring using screws or cable glands, following your notes/pictures and ensuring the polarity is Hot to Hot/Brass, Neutral to Neutral/Silver. Make sure the connections are tight and strong; no exposed copper should be visible outside the connection point.
-
Reassemble the lamp: Carefully thread the fresh cord through the lamp base. Reassemble the lamp base and socket pieces so that no wires become trapped.
-
Test: Turn on the lamp and check functionality.
7. Method 4: Beautifully Loop or Braid the Extra Cable (No Cutting Required)
Often known as "chain string" or "daisy chain," this method creates a neat bundle without tools or cutting. It's easy to undo.
Steps:
-
Start near the plug (or lamp): Choose where to place the bundled section.
-
Create a first loop: Create a small loop of string.
-
Pull through: Pull a new loop—a bight—through the first after reaching through the loop and grabbing the "working end," the longer part of the rope.
-
Repeat: Reach through the new loop, take the working end and pull another loop through. Continue to create a row of loops. Maintain more homogeneous loop sizes.
-
Securing the End (Optional): Take the end of the string and thread it completely through the last loop you created to prevent the chain from breaking easily. Pull lightly to make it tight. Just stop after you make the last loop without pulling the end through if you want it to come off quickly with a tug.
-
Customize: To vary the bundled length, gently tighten or loosen the chain.
8. Choosing the best method for you
-
Reversible and easiest: If you want a quick, non-permanent solution without cutting, Method 2 (cord shortener) or Method 4 (looping/braiding) are best.
-
Permanent & Precise: If you want a custom length permanently and are familiar with basic wiring, Method 1—cut and reattach—is suitable.
-
Damaged cable or complete upgrade: Method 3 (Replace Cable) is required if the cable is damaged or ideal if you want a specific length, color or style, but requires more disassembly/wiring.
9. Frequently Asked Questions (FAQs)
-
Where could I get replacement cables or connectors and tools?
These products are carried by hardware stores, home improvement stores (such as Home Depot or Lowe's) and online retailers such as Amazon. -
Is shortening a lamp cord safe?
In fact, especially unplugging the lamp for methods 1 and 3 if you strictly follow the safety precautions. Consult an electrician if you doubt your own ability to handle wires safely. -
My lamp cord is torn or frayed. Could I still shorten it?
Not at all. A damaged cable is dangerous and should be completely replaced using Method 3. Do not attempt to shorten or repair a damaged cable. -
How should I properly isolate connections?
Make sure no bare wire extends past a screw terminal in a connector. In Method 3, for wire nut connections, make sure the cap is twisted tightly and covers any exposed copper wire. For extra security, wrap electrical tape around the wire nuts and on the insulation of the wires. -
If the wires are not labeled, how can I distinguish the hot and neutral wires?
Standard lamp leads use polarity indicators: while the other wire is smooth (Hot), you will find grooves or ridges on the insulation of one (Neutral). A polarized plug also helps: the narrower one is hot and the wider one is neutral. Never use dangerous techniques such as battery testing. If in doubt, consult an electrician or a detailed wiring guide.
Conclusion
As a result, with proper technique and consideration of safety, these wild lamp cords will be under control. Shortening your lamp cord will help create a safer, cleaner, and more aesthetically pleasing home environment, whether you prefer a simple wrap, a precise cut, or a complete replacement. Appreciate your precisely positioned lights!
