Dimmable LED light strip leads around corners without dark areas
If you search for “dimmable LED light strip” and plan a continuous light line, you will quickly come across a problem at corners: the LED strip lights up on both sides, but there is a dark spot in between. The cause can be too large a distance between the last LEDs, a bulky corner connector or an unfavorably placed profile. A poorly executed connection can also reduce the brightness behind the corner.
For uniform light, the electrical connection, LED spacing and light routing must all work together. An ordinary strip cannot simply be folded flat at 90 degrees. This guide shows which corner solutions work, how you can reduce visible gaps and what is important when dimming. The information refers to low-voltage LED strips with a suitable power supply, not to light strips operated directly with mains voltage.
First clarify: light gap, shadow or voltage drop?
Before replacing a connector, view the light at full brightness. What matters is whether only the corner remains dark or the adjacent strip also shines weaker.
| Observation | Possible cause | Useful test |
|---|---|---|
| Short dark spot right on the corner | Unlit distance through interfaces or connectors | Check the distance between the last LEDs on both sides |
| Stripes behind the corner noticeably darker | Contact problem or voltage drop | Check connection, cable and permitted feed |
| Dark wedge on wall or ceiling | Profile, panel or furniture edge covers the light exit | Temporarily change position and orientation |
| Individual points of light along the route | LEDs too far apart or cover too close to strip | Assess LED density, profile depth and diffuser together |
| Flickering mainly when dimming down | Inappropriate dimming components or unstable connection | Check controller, power supply and contacts |
An electrical measurement and an optical test answer different questions: If the supply is connected correctly, the corner can still appear dark because there is simply no LED there. Conversely, a geometrically clean transition can shine unevenly due to poor contact.
Therefore, first check your dimmable LED light strip in the intended installation position without final gluing. The light image on the wall is often more meaningful than a direct view of the strip.
Lead “dimmable LED strip lights” around corners: the right solutions
Connect separate strips with a short cable bridge
For an ordinary 90 degree corner in a plane is one Cable bridge between two suitably cut sections often the most flexible solution. The first section ends before the corner, the second begins on the following stretch. The electrical connection runs via short cables behind the profile or in a suitable cavity.
Only cut at the markings provided by the manufacturer and only when there is no tension. The cutting positions determine how close the last LEDs get to the corner. If the sections cannot be positioned appropriately due to a rough cutting grid, there will still be a light gap despite the short cables.
The cables must match the voltage, current and number of channels. A solid color strip requires different connectors than an RGB, RGBW, or tunable white system. For digitally addressable strips, data direction and pin assignment must also be taken into account.
Plan the bridge so that there is no tension on the contact surfaces. It must neither lie under a sharp profile edge nor push the diffuser upwards. With a dimmable LED light strip, the connection must be able to reliably transmit power at maximum brightness.
Select solder connection or plug connector
A properly executed solder connection can save space. It is particularly suitable when there is little space left in the profile. The prerequisites are suitable soldering pads, clean processing and secure insulation. Heating for too long can damage the strip; Furthermore, soldering points must not serve as mechanical strain relief.
Connectors are useful when they specifically fit the strip being used. To do this, check not only the width, but also the number of contacts, contact spacing and any coating that may be present. The same stripe width alone does not guarantee compatibility.
An L-shaped connector is not automatically a visually seamless corner. Its housing can separate the illuminated ends or create a shadow itself. Especially when there are visible light lines, it is worth testing with the actual profile.
For coated or cast strips, the manufacturer's connection specifications apply. Cutting and connecting can cause the original protection class to be lost. For damp areas, it is not enough to simply hide an open connection behind a cover.
Only bend suitable strips to the side
A normal flexible LED strip can usually be guided in the intended bending direction, but cannot be placed sideways around a flat corner at will. Forcible folding, bending or twisting can damage conductor tracks and components.
For continuous curves, laterally bendable light strips or suitable flexible lighting systems are particularly suitable. The specified bending axis and the minimum bending radius are decisive. Such products may also not be angled at any sharp angle.
A COB strip has a largely coherent luminous surface, but is not automatically bendable laterally. Even with a dimmable LED light strip in COB design, interfaces can create unlit areas. For a sharp-edged corner, two separate sections with a suitable connection are often necessary.
Profiles and diffusers determine the visible result
Position the illuminated ends correctly
Two mitered profiles can form a clean flow. However, the position of the LEDs in it is crucial: If the illuminated area on each side ends far before the corner, the cover cannot completely compensate for this gap.
Compare the distance between the last light sources in the corner area with the usual LED distance along the strip. A significantly larger distance makes a dark spot more likely. This is an orientation, not a fixed calculation rule, because beam angle, profile depth and reflections also influence the result.
Process profiles separately from the LED strip and deburr cut edges. Conductor tracks, contacts and cables must not touch any conductive metal parts without protection. Never trim a strip outside of its cutting marks just to get it flush in the corner.
Test the diffuser and distance to the wall together
An opal cover distributes the light and can make individual LED points less visible. However, it cannot completely replace a longer route without a light source. A very flat profile also offers little space for optical mixing.
In order for a dimmable LED light strip to have a uniform effect, the LED density, distance to the cover and its light scattering must match. There is no universal minimum distance that works for every band. Test the specific combination before permanently attaching profiles.
With indirect lighting, mounting it slightly back can make the transition appear softer. However, too little distance from the illuminated surface often makes small gaps more visible. A panel can, in turn, cast a shadow exactly at the corner.
If you plan the course within a light cove, the examples will help LED strip lights on the ceiling in the basic placement. The corner connection should then be checked on the actual structure.
Keep electrical supply and dimming stable at the corner
Supply must not collapse around the corner
A connector can be mechanically tight and still have an unfavorable contact resistance. Then the following section glows weaker or the contact point heats up. In the case of multi-colored stripes, only one color channel can be affected.
For a dimmable LED light strip, what counts is the resilience of the entire connection: strips, controllers, cables and connectors must match the intended power. What matters is operation at maximum brightness, not the most commonly used dimmed setting.
A calculation example: Four meters with a stated power consumption of 10 watts per meter require a total of 40 watts. For a suitable 24-volt system, this corresponds to around 1.7 amps. The example does not replace the manufacturer's information on the maximum strip length nor the design of the cables and contacts.
For long distances, an additional feed-in can make sense, provided the system is designed for this. Feed points, cable cross-section and polarity must be planned. Do not connect the outputs of multiple power supplies together on your own initiative and never operate a 12-volt strip with 24 volts.

Dimmer, controller and power supply must fit together
For many low-voltage strips, a suitable controller regulates the brightness on the DC voltage side using PWM. A normal wall dimmer in front of any plug-in power supply is no substitute for this. If dimming is to be carried out on the mains voltage side, the power supply must explicitly match the dimming technology used.
Try full brightness, a medium setting, and the lowest stably usable level. Look for flickering, jumps in brightness, and differences between sections. With a dimmable LED light strip, all connected sections should react together and evenly.
A camera image can provide information about fluctuations in brightness over time, but due to the camera settings it is not a reliable sole proof of flicker-free light. Suitable components and testing under the intended operating conditions are crucial.
Work on fixed 230-volt connections belongs in the hands of a qualified electrician. Power supplies also require the installation conditions specified by the manufacturer and must not be hidden behind a permanently closed panel.
Assembly process: first test, then permanently attach
With a test installation you avoid having to open a corner that has already been glued later. First lay out the profiles, strips and connection in their intended position.
- Measure corner course: Take into account the inside or outside corner, profile geometry and the distance to the illuminated surface. Mark where you want the illuminated sections to begin and end.
- Match cutting marks: Check whether the cutting grid allows the planned lengths. Adjust the positioning instead of cutting the strip outside the allowed areas.
- Establish a voltage-free connection: Use suitable components, pay attention to the connection assignment and secure cables against pulling, chafing and contact with sharp edges.
- Check photo in profile: Put on the intended cover and look at the corner from the usual viewing directions. Also test the reflection on the wall, ceiling or furniture surface.
- Test dimming and supply: Check different brightness levels and, in multi-colored systems, the individual colors. Noticeable heating, dropouts or differences in brightness must be clarified before installation.
- Fasten permanently: Only install after a successful test. Observe the requirements for substrate, heat dissipation and fastening and keep maintenance-relevant parts accessible.
Even with a dimmable LED light strip with a self-adhesive back, the surface determines the hold. Dust, loose coatings and unsuitable surfaces can affect attachment. An adhesive layer also does not replace any required heat dissipation via a suitable profile.
Colored accents behind furniture: keep the corner unobtrusive
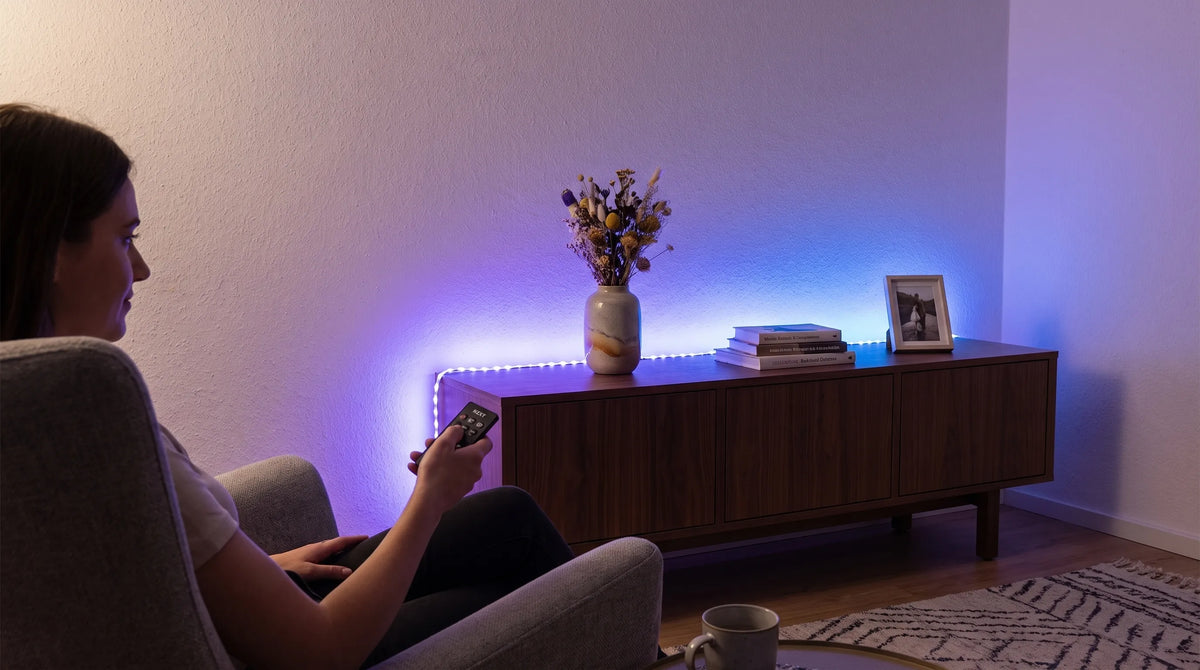
Behind a bed, a sideboard or a television, the illuminated surface is usually noticed, not the strip itself. This gives more scope for concealing a short cable bridge. Nevertheless, the light distribution should be checked before sticking, especially on close walls and shiny surfaces.
For such applications the LED strips colored with remote control from BUYnBLUE a suitable option for colorful accents. The self-adhesive backing is suitable for intended attachment, for example behind furniture or under the bed. For your specific corner solution, check the product information on interfaces, connections and permitted installation. The remote control alone does not indicate compatibility with a separate dimmer.
For furniture and niches, the uniformity also depends on depth, panels and visible lines of sight. The instructions for Planning dimmable LED light strips for furniture and niches help to prepare the installation site sensibly.
Frequently asked questions about LED strip lights on corners
Can I fold a regular LED strip 90 degrees? Not without the express approval of the manufacturer. For a flat right-angled corner, separate sections with a suitable connection are usually a better solution. Folding or sharp bending can damage conductor tracks.
Does a COB strip prevent every dark corner? No. Its largely continuous light surface reduces visible individual points, but interfaces and connectors can still create gaps. The permissible bending direction must also be taken into account.
Why does the corner remain dark despite the milky cover? The unlit area may be too long or the profile may not provide enough space for light distribution. Also check whether a screen is covering the light exit. A diffuser does not replace a missing light source.
Can dimming eliminate a light gap? No. A dimmable LED strip light can make the entire scene appear less bright, but does not eliminate a geometric gap. If only the section behind the corner is noticeable during dimming, contacts and dimming components should be checked.
Determine the corner solution before purchasing
Don't just choose based on light color and brightness. The cutting grid, type of connection, permissible bending direction and profile structure are also crucial for an even corner. Write down these requirements before choosing your LED strip.
For colored indirect lighting you can use the linked one BUYnBLUE-Include strips in your planning. Compare the product information with your corner structure and test the complete connection before permanently installing it.