Plan dimmable LED spots correctly on the ceiling and wall
A room with dimmable LED spots can appear precise, calm and very homely. But it can also quickly look like a showroom if spots are gridded too evenly, chosen too brightly or dimmed incorrectly. Good planning therefore does not begin with the question of how many spots fit in the ceiling, but rather with the question of what lighting mood the room needs at what time of day.
If LED spots are to be dimmable, it's about more than brightness. Position, beam angle, light color, dimmer, driver and wall distance must match. Glare, hard shadows or unsteady light spots can quickly arise, especially on ceilings and walls, if you only plan based on your gut feeling.
This guide will show you how to plan dimmable LED spots so that they appear architecturally clean, light pleasantly and remain flexible in everyday life.
First define the lighting task
LED spots are directional lights. This is their big advantage, but also their most common planning mistake. A spot does not automatically illuminate the entire room evenly, but rather shines light on a zone, a surface or an object. That's why you should first clarify what task each spot should fulfill.
Three types of light are usually needed in living spaces: basic light for orientation, work light for activities and accent light for atmosphere. Dimmable light connects these levels because you can use the same installation softer in the evening and more functional during the day. Nevertheless, dimmability is not a substitute for good positioning. An incorrectly placed spot is blinding even if it is dimmed to 40 percent.
| Light task | Typical application | Appropriate spot planning |
|---|---|---|
| Basic light | Hallway, kitchen, bathroom, living area | Wider beam angles, even distribution, multiple zones |
| Work light | Kitchen countertop, desk, vanity unit | Precise alignment, higher illuminance, positioned with low glare |
| Accent light | Pictures, shelves, wall structure, plants | Narrower beam angle, flexible spots, separate dimming |
| Mood lighting | Evening light in the living room or bedroom | Warm light, low dimming levels, indirect supplement |
If you would like to get more involved in planning ceiling lighting, you can find it in BUYnBLUE Guide to Glare-free LED lighting on the ceiling additional information on basic light, work light and accent light.
Amount of light: How bright should dimmable LED spots be?
The amount of light required depends on the size of the room, wall colors, ceiling height, usage and personal preference. Dark surfaces absorb significantly more light than white walls. A room with an oak floor, a dark kitchen and matt walls therefore needs more lumens than a bright room with white surfaces.
As a rough guide, you can work with Lux. Lux describes how much light reaches a surface. For living spaces, these values are not rigid standards, but rather practical planning areas.
| room or zone | Orientation value | Planning note |
|---|---|---|
| Hallway and entrance area | 50 to 150 lux | Uniform, low-glare, can be combined with motion detectors |
| Living room basic light | 100 to 200 lux | It is better to have several dimmable zones than a very bright row of spots |
| Kitchen in general | 200 to 300 lux | Do not place spots behind the person working |
| Kitchen work surface | 300 to 500 lux | Additional work light under wall cabinets is often useful |
| Bathroom in general | 200 to 300 lux | Observe protection areas and IP protection |
| Mirror area | 300 to 500 lux | Side or frontal light reduces shadows on the face |
| bedroom | 100 to 200 lux | Prefer soft dimming and warm light color |
A simple rough calculation is: room area in square meters multiplied by the desired lux gives the required luminous flux in lumens. For a 20 square meter living room with 150 lux, that would be 3,000 lumens. Since lights, beam angles and room surfaces cause losses, a reserve makes sense. With dimmable spots, this reserve is not a problem as long as the lowest dimming level is pleasantly low.
Position LED spots correctly on the ceiling
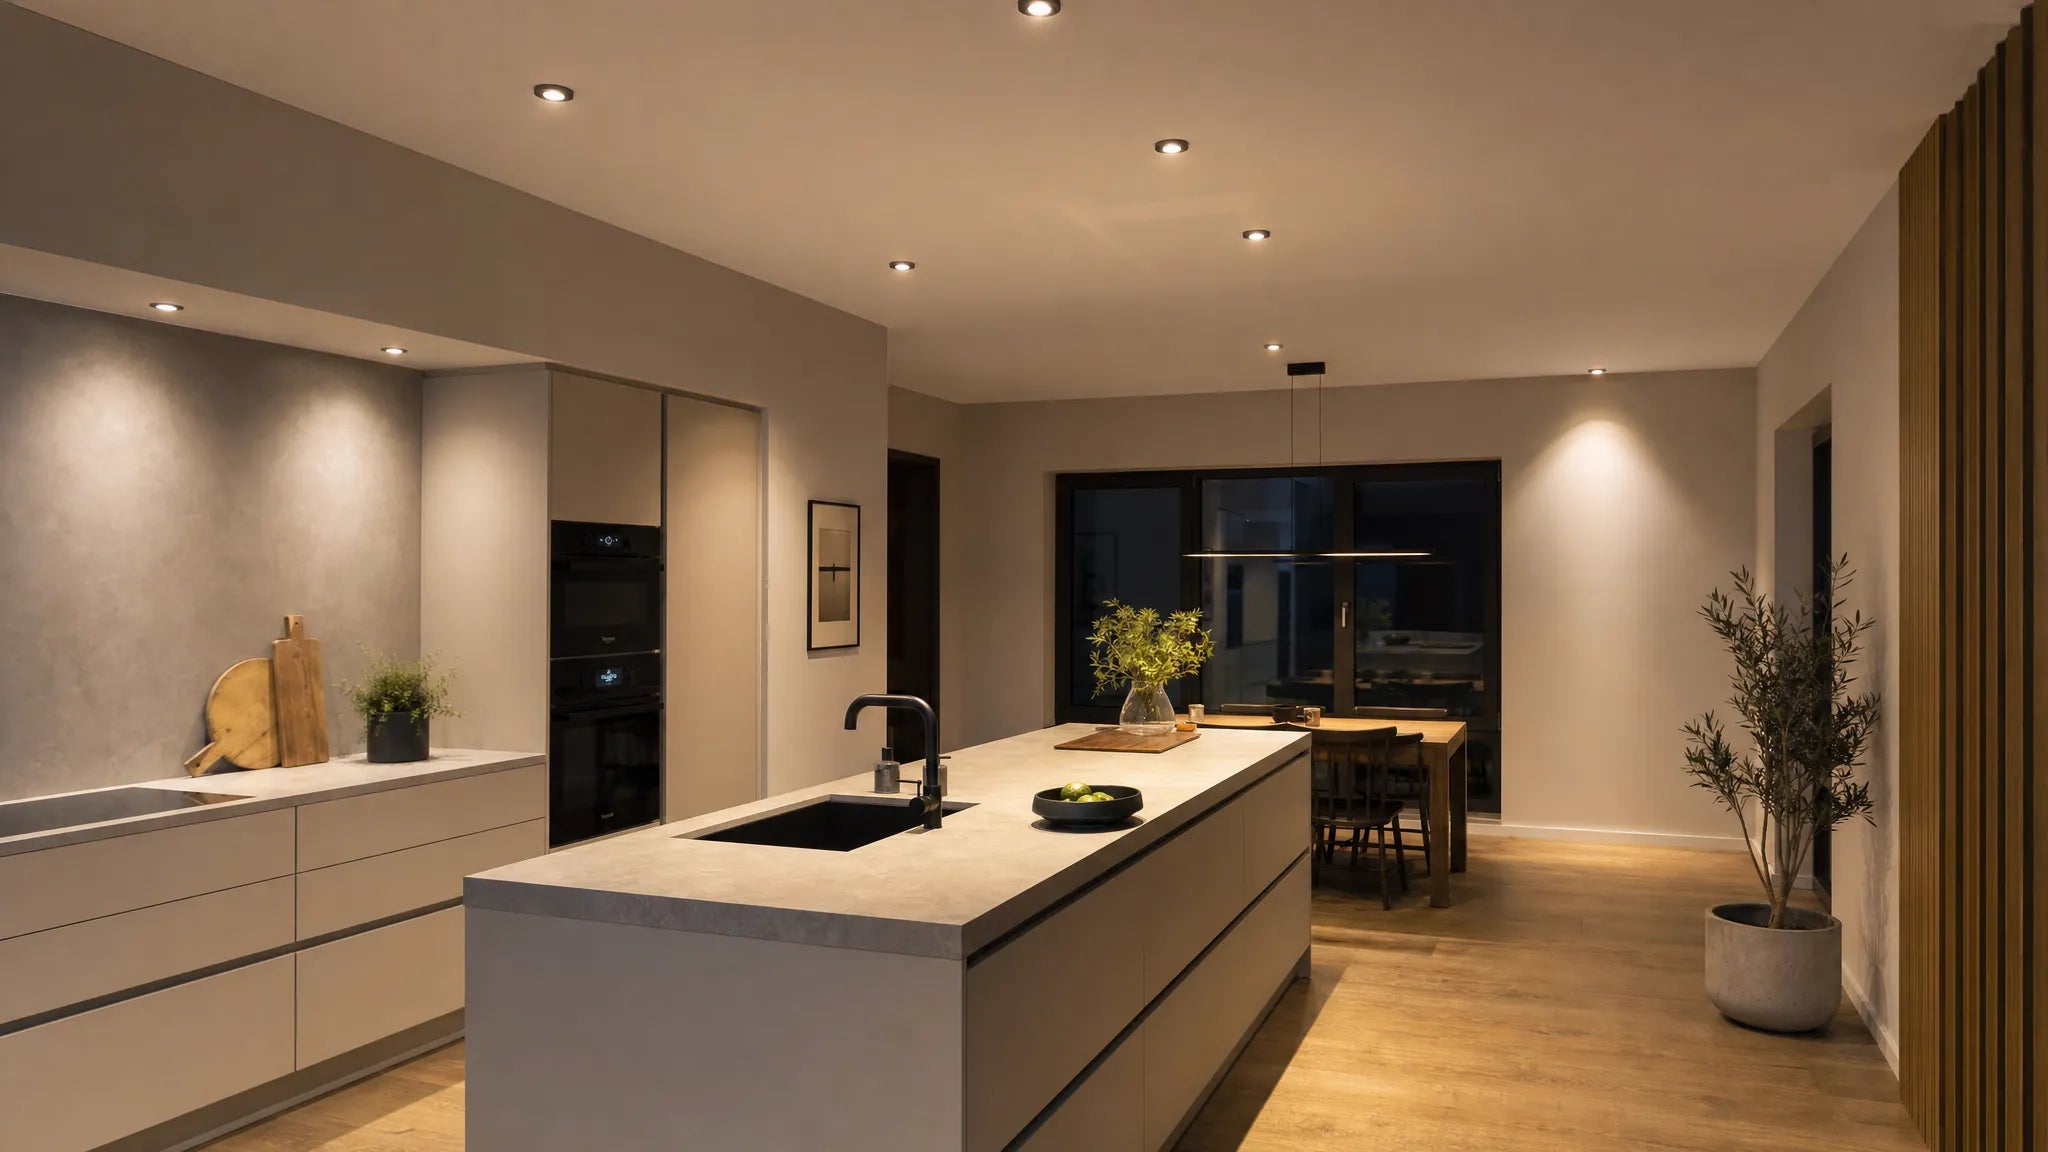
The ceiling is the most common position for spots because it covers large areas and the lights can visually recede. This is precisely why poor grid planning immediately appears unsettling. Too many spots make the ceiling stained, too few create dark zones.
A proven approach is planning in axes. Align spots with architecture, furniture and usage zones, not just with the geometric center of the room. In the kitchen, the worktop counts. In the living room, the sofa, wall surfaces, shelves and paths count. The direction you walk in the hallway counts.
The following rule of thumb applies to the distance: The distance between two spots should match the installation height and the beam angle. With a normal room height of around 2.40 to 2.70 meters, many ceiling spots are approximately 1.0 to 1.8 meters apart. Spots with narrow beams usually need smaller distances, while spots with wide beams can be further apart.
The distance from the wall is also important. If a spot is placed too close to the wall, a hard beam of light is created. If it is placed too far away, the wall will remain dark and the room will appear smaller. For general downlighting, a wall distance of about half the spot distance is often a good starting point. Different rules apply to wallwashing or grazing light, more on that in a moment.
| Beam angle | Effect | Typical application |
|---|---|---|
| 15 to 25 degrees | Very focused beam of light | Art, sculptures, high ceilings, strong accents |
| 30 to 40 degrees | Precise, but more homely | Kitchen islands, dining tables, pictures, shelf areas |
| 50 to 60 degrees | Wider and softer | General light in living rooms and hallways |
| Over 60 degrees | Flat light emission | Basic lighting, low ceilings, less dramatic accents |
Avoid spots directly above sitting positions, beds or frequent lines of sight. A spot above the sofa can be blinding when you lean back. A spot above the bed can seem uncomfortable as soon as you lie down. It is better to place light slightly in front of, next to or behind the usage zone and, if necessary, direct it towards wall surfaces or furniture.
Wall spots: More depth, less ceiling grid
Wall light is often underestimated when planning spots. Vertical lighting has a major influence on whether a room appears bright and high-quality. The human eye perceives walls more clearly than the floor. If only the floor is bright through ceiling spotlights, a room can appear flat and uncomfortable despite high lumen values.
There are three typical strategies on the wall. Wallwashing illuminates a wall as evenly as possible and makes the room appear larger. Grazing light sits closer to the wall and emphasizes structure, such as plaster, stone, wooden slats or curtains. Accent lighting sets a clear focus on pictures, shelves or objects.
| Wall light type | Positioning | Effect |
|---|---|---|
| Wallwashing | Ceiling spot usually 50 to 90 cm from the wall | Quiet, bright wall surface, visually more depth in the room |
| grazing light | Ceiling spot usually 15 to 35 cm from the wall | Emphasizes surface structure, creates stronger shadows |
| Image accent | Spot aimed at object, often with 30 degree rule | Precise focus, less reflection on glass or frame |
| Wall mounted spot | Often around 150 to 180 cm installation height | Flexible accent light, good for hallway, bed or reading corner |
The 30 degree rule is particularly helpful for images. The spot is aligned so that the light falls on the image at an angle of approximately 30 degrees to the vertical. This reduces the risk of light being reflected directly into the eyes or annoyingly reflected on glass surfaces.

Dimming is a system, not a single product feature
A common misconception is that if the spot says dimmable, it will work with any dimmer. In practice, light sources, LED drivers and wall dimmers must be compatible. Otherwise, flickering, humming, delayed switching on or a minimum value that is too high can occur.
Trailing edge dimmers are used in many LED spots, especially with electronic LED drivers. But there are also products that use phase control, DALI, 1 to 10 V, Zigbee, Bluetooth or manufacturer's own controls. The manufacturer's information is always crucial. Especially if there are several spots on one dimmer, the total load should be within the permitted range. Old dimmers for halogen lamps often have a minimum load that modern LED spots cannot achieve.
Pay attention to these points before buying:
- The spot or lamp must explicitly be dimmable.
- The dimmer must match the dimming technology of the LED driver.
- The minimum load and maximum load of the dimmer must match the number of spots.
- All spots in a dimming group should be technically identical or expressly compatible.
- The lowest dimming level should be really comfortable and not just start at 30 or 40 percent.
- With smart systems, it must be clear whether dimming takes place on the wall switch, via an app or via a separate controller.
For a deeper technical classification, the supplementary one is worthwhile BUYnBLUE Article too dimmable LED ceiling lights, especially when you compare between integrated LED modules, replaceable bulbs and different dimmers.
Choose the right light color and color rendering
Dimmable light is only pleasant if the light color and color rendering are correct. For living rooms, 2,700 Kelvin usually seems warm and cozy. 3,000 Kelvin is a little clearer and goes well with modern kitchens, bathrooms and hallways. 4,000 Kelvin can be useful in work areas, but quickly appears matter-of-fact in living spaces.
The color rendering index, often called CRI or Ra, is also important. For living spaces, CRI 90 or higher is recommended, especially for kitchens, dining areas, art, textiles and wooden surfaces. A low CRI can make colors appear flat or distorted.
| Value | Effect | Suitable for |
|---|---|---|
| 2,700K | Warm, homely, relaxing | Living room, bedroom, dining area |
| 3,000K | Warm white, clearer and more modern | Kitchen, bathroom, hallway, eat-in kitchen |
| 4,000K | Neutral white, objective | Housekeeping, hobby room, functional work zones |
| CRI 90 plus | Natural color reproduction | Living rooms, kitchen, art, high-quality materials |
Dim-to-warm solutions are particularly convenient. When dimming, the light not only becomes darker, but also warmer. This is similar to the behavior of classic light bulbs and appears much more natural in the evening than an LED spot that stays cold at low power.
Room examples for ceiling and wall
In the kitchen, ceiling spotlights should not sit directly behind the person standing at the worktop. Otherwise the body will cast shadows exactly where light is needed. A spot axis in front of the work surface or a combination of ceiling spots and under-cabinet lights is better. Separate dimming circuits make sense for the kitchen island and dining table so that work light and mood light remain independent.
In the living room, a pure spot ceiling is rarely the best solution. It is better to plan fewer downlights and add wall lights, floor lamps or pendant lights. Spotlights can accentuate shelves, pictures or curtains, while a decorative light above the coffee table or dining table creates cozy depth. At BUYnBLUE you find modern lights for different living areas, which can be easily combined with technical spot lighting.
In the bedroom, spots should appear calm and more indirect. They are often uncomfortable directly above the headboard or above the lying surface. Wall spots are better than reading lights, dimmed accent spots on cabinet fronts or soft general lighting near the edges of the room.
In addition to the lighting effect, safety must be right in the bathroom. In Germany, the electrical protection areas in accordance with DIN VDE 0100-701 must be observed in the bathroom. Depending on the position in relation to the shower, bathtub or washing zone, appropriate IP protection levels are required. The installation should always be planned and carried out by a qualified electrician.
Orientation counts in the hallway and on stairs. Spots should make steps, doors and cloakrooms clearly visible, but not glare at eye level. Wall spots or asymmetrically aligned ceiling spots can be more pleasant here than a hard row in the middle above the walkway.
Plan circuits and scenes
The best spot planning loses quality if all the lights are connected to a single switch. Dimmable LED spots only develop their benefits through separate light zones. At least basic lighting and accent lighting should be controllable separately. In open kitchen-living rooms it is often worth dividing the kitchen, dining area, living area and wall accents.
Think in terms of scenes instead of just switches. A cooking scene needs bright, clear work light. A dining scene needs warm light across the table and wall. A film scene hardly needs any ceiling light, but it does need gentle wall or shelf lighting. A cleaning scene can be very bright for a short time. Such scenes can be implemented with classic dimmers, multiple switches or smart systems.
With smart solutions, it is important that the operation remains suitable for everyday use. Guests and family members shouldn't necessarily need an app to turn on lights. A well-placed wall switch or a physical scene button makes the technology much more convenient in everyday life.
Installation, surface or busbar?
Recessed spotlights appear minimalistic, but require space in the ceiling. Installation depth, cutout dimensions, distance to insulation, heat dissipation and access to the driver must be clarified early on. Built-in spotlights are often more complex in concrete ceilings or existing apartments because cable routing and ceiling cutouts are limited.
Surface-mounted spots are easier to retrofit and can be interesting in terms of design. They are suitable if there is no suspended ceiling or if you deliberately want to use the lights in a visible manner. Tracks offer maximum flexibility because spots can be subsequently moved, added or realigned. This is particularly useful in open living areas, galleries or rooms where the furniture can change.
Common mistakes with dimmable LED spots
Many lighting problems arise not from bad products, but from incomplete planning. The following errors can be easily avoided if you check them before installation.
- Too many spots are distributed evenly across the entire ceiling without taking furniture and usage zones into account.
- Spots sit directly above the sofa, bed or dining table and cause glare during normal use.
- All spots are connected to a single dimmer, even though the room needs several lighting moods.
- The beam angle is too narrow, resulting in bright circles and dark spaces.
- The wall distance is incorrect, leaving walls stained or too dark.
- The dimmer does not match the LED driver and causes flickering or humming.
- The light color is too cold for the living area.
- Recessed spots are planned without checking installation depth, heat dissipation and maintenance.
Quick checklist before purchasing
Before you order or have LED spotlights installed, you should create a simple lighting plan. Mark furniture, paths, countertops, wall surfaces and art. You then decide which areas need basic light, work light or accent light.
Then check the spot type, luminous flux, beam angle, light color, CRI, dimming system and mounting type. Plan separate circuits for different scenes and check with a qualified electrician whether wiring, dimmers, drivers and protection areas are suitable. This coordination before purchase is particularly worthwhile for bathrooms, kitchens, suspended ceilings and smart controls.
Frequently asked questions
How many dimmable LED spots do I need per room? This depends on the size of the room, usage, ceiling height, surfaces and beam angle. First do a rough calculation of lux and lumens, then plan by zone rather than a rigid spot-per-square-meter scheme.
What distance makes sense between LED spots on the ceiling? For a normal living space height, many plans are between 1.0 and 1.8 meters. Spots with narrow beams need smaller distances, while wide spots can be further apart. The distance from the wall should match the lighting task.
Are dimmable LED spots suitable for the bathroom? Yes, if the luminaire, protection class and installation match the respective protection area. In the bathroom, a qualified electrician should check which IP protection class and mounting position are permissible.
Why do LED spots flicker when dimming? Dimmers, LED drivers and load ranges often do not match. Mixed lamps, old halogen dimmers or very low dimming levels can also cause flickering.
Which light color is best for dimmable spots? For living spaces, 2,700 K or 3,000 K are usually ideal. In functional areas, 4,000 K can make sense. Dim-to-warm spots are particularly pleasant for a cozy evening atmosphere.
Conclusion: Good spot planning combines technology and atmosphere
Dimmable LED spots are ideal if you want to control light precisely. But they must be carefully planned. The most important decisions are lighting task, position, beam angle, wall distance, light color and dimmer compatibility. Only when these points interact does light arise that is bright enough, low-glare and atmospheric.
If you would like to supplement your spot planning with high-quality designer lights, we offer BUYnBLUE a curated selection of modern lighting for different living areas. Particularly practical: pendant lights and chandeliers can be adjusted free of charge, for example in terms of cable length, canopy or color. This means that technical lighting on ceilings and walls can be combined with a harmonious design concept.