

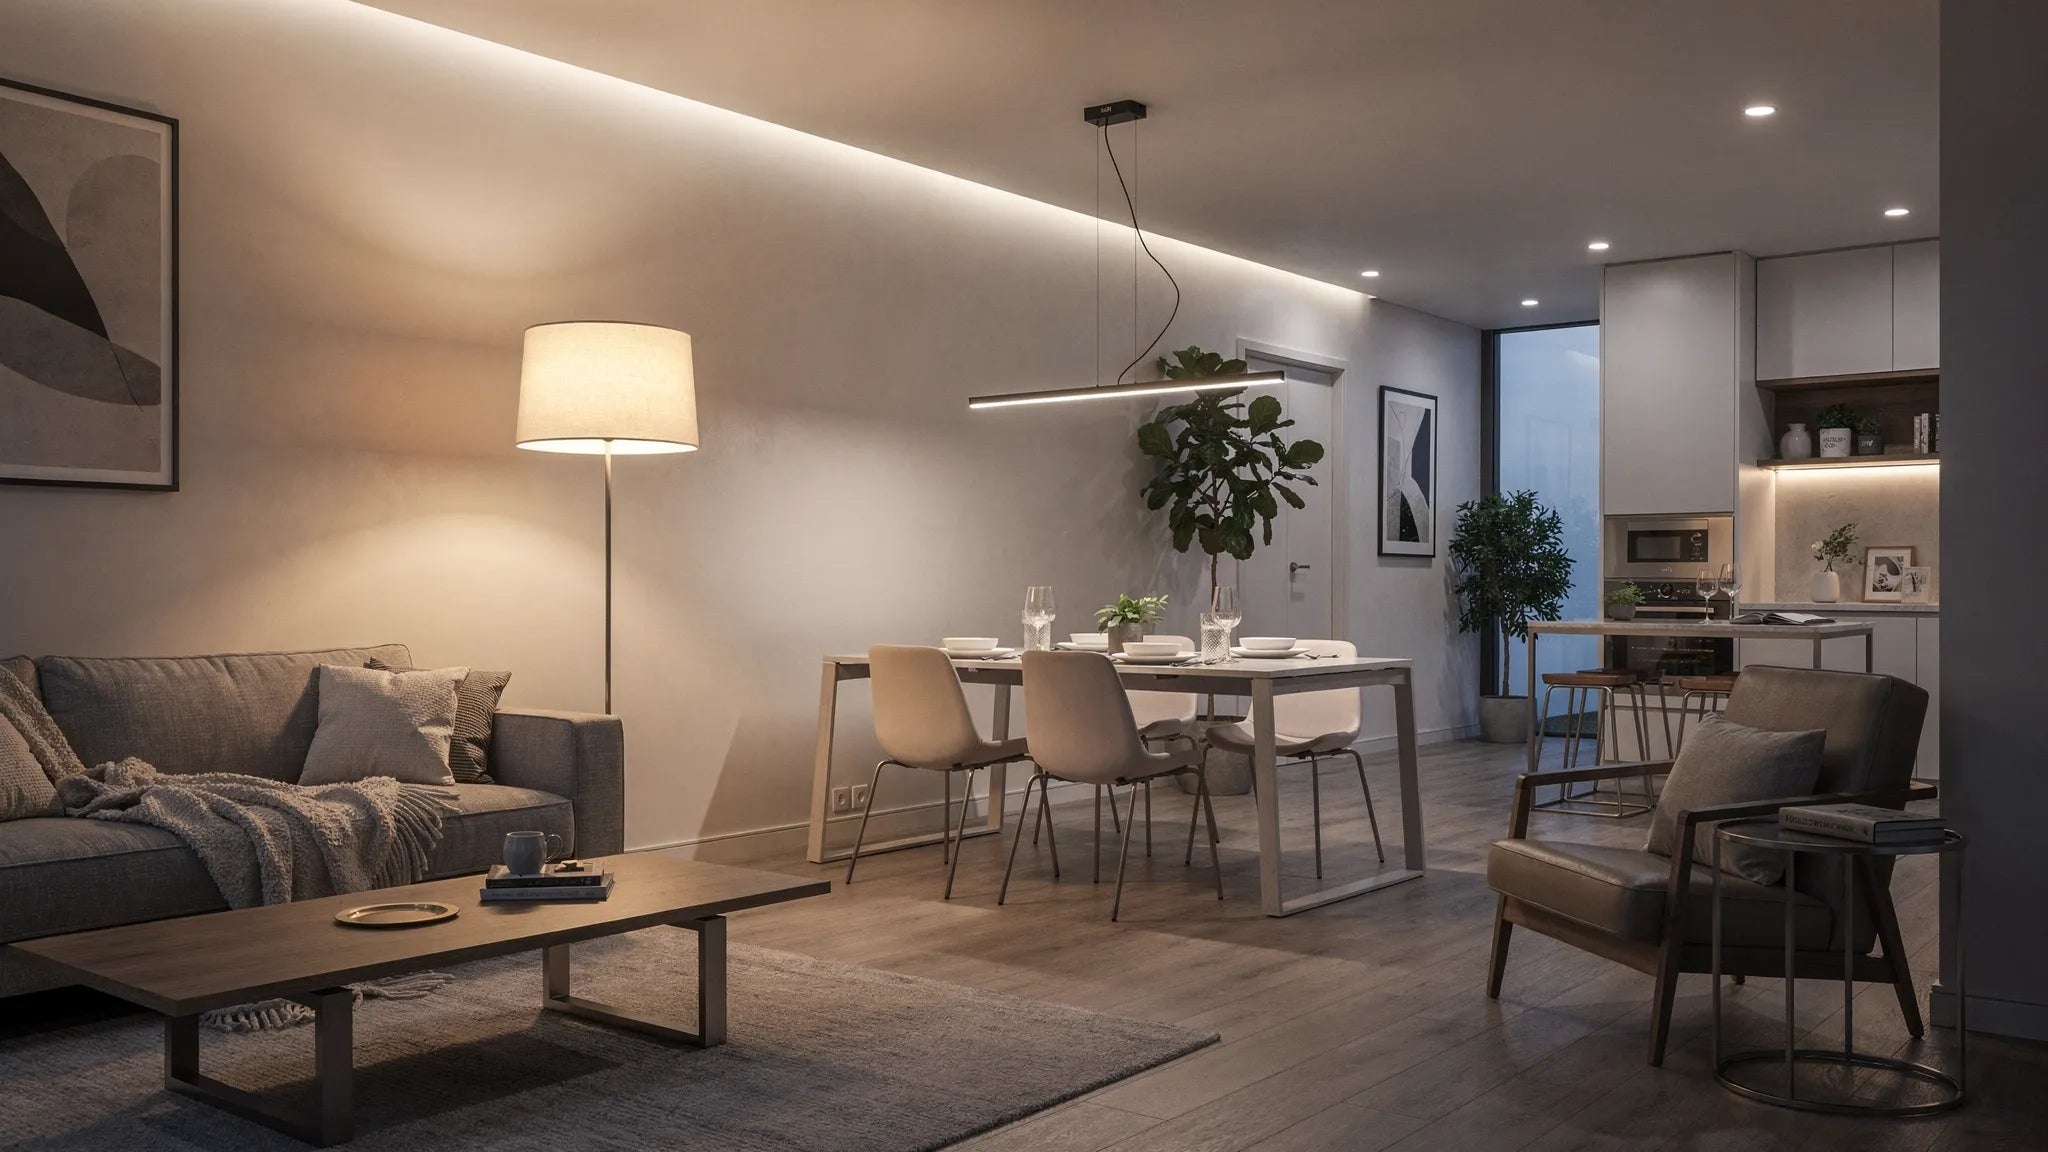
Dining table pendant light: Plan the height, width and distance correctly
If one Pendant lamp above the dining table If it is hung too high, the table appears lost and the light is still often blinding. If it hangs too low, you will no longer be able to look your guests in the eye and you will quickly bump into it when you get up. The good news: With a few clear measures you can Height, width and spacing plan very reliably, regardless of whether you are illuminating a small 2-person table or a long table.
The three crucial dimensions (and what exactly is meant)
Before you measure, it is worth clarifying the terms:
- Height: This almost always means that Lower edge of the lamp above the table top (not above the floor).
- Width/Length: The visible size of the lamp (shade diameter or beam length) in relation to the table size.
- Distance: Horizontal distance to table edges, walls and (if there are several pendulums) the distance between the lights.
With these three adjusting screws you not only determine the appearance, but also freedom from glare, shadows and suitability for everyday use.

Dining table pendant light: the right height above the table top
The tried and tested basic rule is:
Lower edge of the pendant light: approx. 60 to 75 cm above the table top
This is the area where the light hits the table well, faces are pleasantly illuminated and the line of sight across the table usually remains clear.
How to quickly calculate the height
- Measure the Table height (typically approx. 74 to 78 cm).
- Add up 60 to 75cm.
Example: table height 76 cm
- Lower edge of the light at a distance of 60 cm: 136cm above ground
- Lower edge of the light at a distance of 75 cm: 151cm above ground
When should it be 60 cm, when should it be 75 cm?
- More like 60cm: If the light diffuses a lot, the table is large or you want more “stage light” on food.
- More like 75cm: If you prioritize a clear view over the table, the lamp is voluminous or there are often many people sitting around.
Take the ceiling height into account (so that it doesn’t appear “squeezed”)
In old buildings or open kitchen-living rooms, the height of the room is also a deciding factor. The 60 to 75 cm rule remains a good start, but if the ceiling is very high, the lamp can often hang a little lower in order to comfortably zone the dining area.
This table helps as a guide (guide values, based on the lower edge of the luminaire):
| Ceiling height | Recommendation lower edge above table top | Typical effect |
|---|---|---|
| 230-240cm | 65-75cm | more headroom, quieter view |
| 250-270cm | 60-75cm | Standard range, very flexible |
| 280-320cm | 60-85cm | deeper possible for more “intimacy” |
| > 320cm | 70–95 cm (and larger lamp) | otherwise the table will quickly appear lost |
Important: These are planning values. If there is a lot of traffic in the room that goes directly past the table, “higher” is often the better decision.
The right width and length: proportions to the table
A pendant lamp appears to be of high quality if it clearly “addresses” the table but leaves room for space on the sides.
Rules of thumb for rectangular tables
For linear pendant lights (bars, elongated designs) or several pendants in a row:
- Lamp length: approx. 2/3 of the table length
- Alternatively: Leave 30 cm free at each end of the table
This reduces glare for people at the front and has a balanced effect.
Rules of thumb for round or square tables
- Diameter of the lamp: approx. 1/2 to 2/3 of the table diameter
For very small tables, a smaller span makes sense so that the lamp doesn't overwhelm you.
Example sizes (quick lookup)
| Table size | Recommended luminaire size (guide value) |
|---|---|
| 120×80cm | 70-90cm (linear) or 35-50cm (round) |
| 160 × 90cm | 100-120cm (linear) or 45-60cm (round) |
| 200×100cm | 130-160 cm (linear) or 55-70 cm (round) |
| Ø 110-120cm | Ø 55-75cm |
Note: For very “airy” lights (e.g. delicate frames), the light may be slightly larger. If you have massive shades or dense opal glasses, plan more conservatively.
Plan the distance correctly: table edge, wall, walkways
“Distance” is the underestimated part of planning, especially in open-plan kitchens.
Distance to the edge of the table
Plan so that the lamp(s) do not hang too close to the edge of the table:
- Ideal: edge of the lamp at least 25 to 35 cm inside the edge of the table
This means that people on the long sides are not sitting directly under the edge of the umbrella and the illumination remains more even.
Distance from the wall or high furniture
If the dining table is close to a wall or sideboard:
- Let at least 60 cm free between the edge of the table and the wall so that chairs can be pushed back.
- With pendant lights, it is also crucial that they remain visually centered above the table (not above the room).
Passage areas
If a path leads past the table, the lamp often hangs “in the way”. Two solutions are the most reliable in practice:
- Hang a little higher (more like 75 cm instead of 60 cm).
- Flatter lamp shape choose (e.g. more linear instead of spherical, depending on the style).
Several pendant lights above the dining table: distances and symmetry
Three small pendants can look more elegant over a long table than a large umbrella. Simple logic helps so that it doesn’t look “random”.
Recommended distance between multiple pendulums
- Distance center to center: approx. 50 to 70 cm (typical for 2 to 3 pendulums)
The specific value depends on the umbrella diameter and table width. Large umbrellas need more distance, small ones can be closer together.
How to distribute 2 or 3 pendulums neatly
- Put the first Total length which should be “illuminated” (usually 2/3 of the table length).
- Then distribute the pendulums evenly within this length.
- Make sure that the outer pendulums are not too close to the ends of the table (approx. 25 to 35 cm of space at each end).
Practical example: table 200 cm long, 3 pendulums
- Target zone: approx. 140 to 160 cm (2/3 to 80 percent of the table length)
- Distribution: 3 pendulums evenly in this zone, distance center to center often approx. 55 to 65 cm
If your ceiling outlet doesn't fit properly, planning quickly becomes complicated. In such cases one is Multiple rosette (canopy) or an offset connection is helpful. You can find an overview of safe relocation here: How do you move lamps correctly?
Special cases: high ceilings, sloping ceilings, extendable table
Very high ceilings
For room heights over 3 m, the following almost always applies: The luminaire must “grow with you”, otherwise it looks too small and too far away.
- Don't automatically hang higher just because the ceiling is higher.
- Rather, plan a larger light or several pendulums, so that the dining area is clearly defined.
Sloping ceilings or offset ceiling points
Geometry is often the biggest hurdle here. Solutions are for example:
- Rail systems or variable suspensions
- Pendulum with flexible cable routing
If you have a sloping roof, this guide will be helpful: Which lighting in rooms with sloping ceilings?
Extendable dining table
An extendable table is one of the most common reasons for “somehow it never fits”.
- If the table is often extended, base the lamp length on the Maximum length.
- Alternatively: several pendulums that work evenly even when extended.
Quality of light that saves planning: glare, shadows, dimming
Even perfectly planned dimensions can appear unpleasant if the light is blinding or too harsh.
Avoid glare
- Opal diffusers, deeper shades or indirect components often have a more pleasant effect.
- Make sure that you do not constantly look at the lamp while sitting.
brightness and mood
Two things are crucial for the dining table: enough light for eating and a cozy character. Many lighting planners focus on moderate lighting levels for living areas, combined with dimmability. If you are unsure, it helps to understand lumens better than watts. This fits: Watt and lumen, what's the difference?
color temperature
- For dining areas is common warm white (approx. 2700 to 3000 K) elected.
- With a dimmer, the light looks much more homely in the evening without being too dark during the day.
10-Minute Pre-Purchase Planning (Checklist)
- Measure table length and table width (including extension, if available)
- Measure table height
- lower edge of the pendant light 60 to 75 cm above the table top set
- Check the ceiling height and decide whether “standard” or “lower for more zones” makes sense
- Determine target size (linear approx. 2/3 of the table length, round approx. 1/2 to 2/3 of the table diameter)
- If there are several pendulums: determine the number and 50 to 70cm Roughly plan the distance from center to center
- Check seating and walking paths (people passing by, pushing back chairs)
- Testing glare (sight lines while sitting)
- Determine dimmability and light color
- Check ceiling connection and mounting options (central, offset, multiple canopy)
If dimensions don't fit: How BUYnBLUE helps with the fit
Especially when it comes to keyword topics “Dining table pendant light” The purchase often fails not because of the design, but because of details such as cable length, canopy solution or color adjustment for the furnishings.
BUYnBLUE therefore relies on a curated selection of modern designer lights and offers chandeliers and pendant lights free customization on, for example:
- Adjust cable length to your ceiling height
- Configure the canopy to suit the ceiling situation
- Coordinate color variants
Come to this free shipping worldwide, a 14 day return policy as well as support via customer service. If you would like to be inspired in advance, the easiest way to start is via the shop overview: buynblue.com
