
Which lighting in rooms with sloping ceilings? - Tips and tricks
Step by step instructions for perfect light in rooms with sloping ceilings
Do you know that? You enter your attic, this room that is actually so full of character, and a feeling of confinement creeps over you. It's a charming retreat during the day, but as dusk sets in, the slopes seem to swallow up all the light. The ceiling feels like it's getting closer, the corners are sinking into darkness and the hoped-for comfort gives way to an oppressive "tent feeling".
If this sounds familiar, then you've come to the right place. Illuminating a room with a sloping ceiling is the supreme discipline of lighting design - and the place where most do-it-yourselfers and even some professionals fail. But I promise you: your sloping roof is not your enemy. It is your greatest opportunity. It is a huge canvas that, when used correctly, can transform your room into a bright, spacious and breathtakingly cozy oasis. Forget everything you thought you knew about standard lighting. We are now embarking on a journey and turning your problem space into a shining masterpiece.
Your complete roadmap to the perfect attic light:
- Part 1: The Psychology of Light – Why Your Attic Is (Still) Suffocating You
- Part 2: The 3-layer strategy – the secret of the lighting planners
- Part 3: The right tools – your lamps for the slanted
- Part 4: Light recipes for practice – tailor-made solutions
- Part 5: The 3 Cardinal Mistakes (and How to Guaranteed to Avoid Them)
- Conclusion: Unleash the potential of your sloping roof
Part 1: The Psychology of Light – Why Your Attic Is (Still) Suffocating You
Before we talk about lamps, we need to talk about our brains. Our well-being in a room depends largely on our unconscious perception of safety and space. Dark ceilings and walls signal to our primal instinct that we are in a “cave” – which can be cozy but is often perceived as confining. A single lamp shining downwards from the slant enhances this effect: it creates a bright spot on the floor and makes the ceiling and upper wall areas appear even darker. The room appears lower, the slants literally “fall” on our heads.
Our goal is to reverse this effect. We don't want to light the ground. We want make the slopes and walls themselves glow. We want to use the light to "wash" and model the architecture. If the boundaries of the room are bright, our brain interprets this as openness and space. The room suddenly “breathes”. This is not esotericism, this is applied perception psychology. And it is the key to your success.
Part 2: The 3-layer strategy – the secret of the lighting planners
Forget the idea of “one lamp for everything”. Professionals always think in three layers of light, one on top of the other, which together create a harmonious whole. This concept is vital for sloping roofs.
- The basic lighting (the foundation): It ensures an even, orienting brightness throughout the room. It is functional and should be dimmable so you can control the overall lighting mood.
- The Zone Light (The Islands): This is about function. A reading light on the armchair, a pendant light above the dining table, a desk lamp. This light defines areas and makes them usable.
- The Accent Light (The Soul): This is the light that creates atmosphere. It highlights the texture of a wall, highlights an image or creates indirect light coves. It is the emotional light that takes a room from "bright" to "alive".
Your job is to select the right tools for each of these three layers and combine them intelligently.
Part 3: The right tools – your lamps for the slanted
Now it's getting concrete. Which lamps are suitable for implementing the 3-layer strategy under the slope?
The basic lighting: tracks, cable systems & spots
These systems are unbeatable for flexible and powerful basic brightness. They are the workhorses of your lighting.
Rail and cable systems: The all-rounders
Think of a track as a flexible power source on the ceiling. You can attach spots, pendants or floodlights to it and move and realign them at any time. Mount the system along the ridge (the highest point) or parallel to it. From there you can use adjustable spotlights to specifically illuminate the slopes and thus create bright, indirect basic lighting. A cable system works similarly, but can be elegantly stretched from wall to wall, which is ideal if you don't want to drill into the slope's delicate vapor barrier.
For most private applications, one is enough 1-phase rail. All lights on it are switched and dimmed together. One 3-phase rail allows you to have three separately switchable circuits. This would allow you, for example, to control the spots for the left slant separately from the spots for the right slant. This is a luxury, but can be very useful in large rooms.
Adjustable setup spots: The precision painters
If a rail system seems too bulky, individual, adjustable surface-mounted spots are an elegant alternative. Mount several of them in a row on the slope and point them consistently towards the high, straight wall (the knee stick). This technique is called "Wall Washing". The light moves along the wall and is gently reflected from there. The result: no glare, uniform brightness and a room that immediately appears wider and more open.
The hanging lamp dilemma: This is how it finally hangs straight
The dream of the chic Pendant Lamp above the table does not have to burst on the slope. There are three elegant solutions:
- The joint adapter: A small joint that is mounted between the ceiling connection and the lamp canopy. It compensates for the slope and allows the cable to fall perfectly vertically. Simple but ingenious.
- The “monkey swing”: A creative solution where you connect a lamp with a very long cable to a decentralized ceiling outlet. You guide the cable to the desired position using one or more ceiling hooks. With a beautiful textile cable, it becomes a cool design statement.
- The light cluster: Instead of one large lamp, hang several small pendant lights at different heights from a single, but slanted, connection point. The resulting tangle appears intentional and distracts from the slant.
Mood lighting: Indirect lighting to warm your soul
This is where the magic happens. Indirect light is soft, glare-free and creates an incomparable atmosphere.
Wall lights as room shapers
Install wall lights on the straight walls under the slope (the knee wall) that emit their light upwards and downwards. The light directed upwards brightens the slant, while the light directed downwards creates an accent on the wall. This breaks the monotony of long walls and creates a cozy, hotel-like depth.
LED strips: The invisible space miracles
LED strips are the secret weapon for seamless lighting effects. Hide them:
- On visible ceiling beams: Aim the light upwards to indirectly illuminate the ceiling between the beams. This is how they will be Roof beams beautifully presented.
- On high cabinets or shelves: The unused space between the cabinet and the slant becomes a light source.
- Behind the headboard of the bed: Creates a floating effect and a perfect, glare-free reading light.
Part 4: Light recipes for practice – tailor-made solutions
Every room has different needs. Here are three specific recipes:
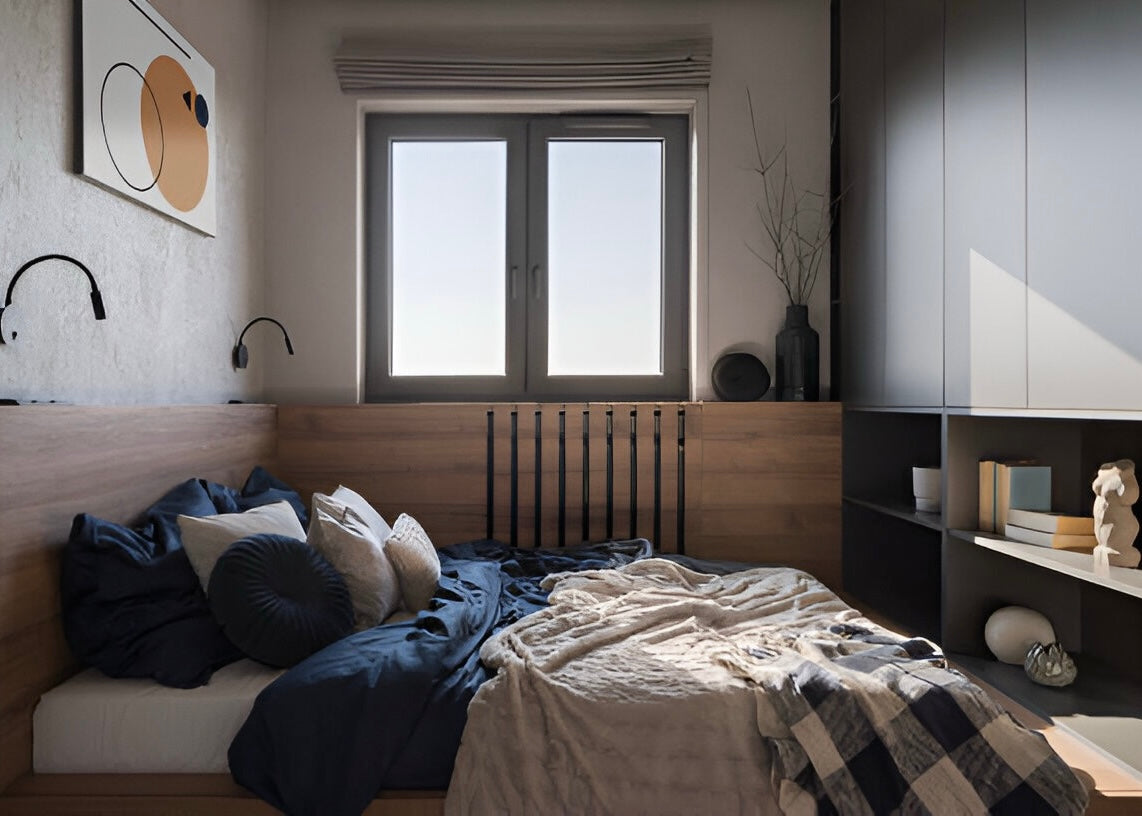
For the cozy bedroom
We want relaxation here. The basic lighting should be warm and highly dimmable (e.g. through wall washing with spots). Zone lighting is indispensable: two small, low-hanging pendant lights or adjustable wall lights next to the bed replace the classic bedside lamps and create coziness. As an accent light, an LED strip behind the headboard creates the wow effect. So will yours Bedroom with sloping ceiling to the cozy cave.
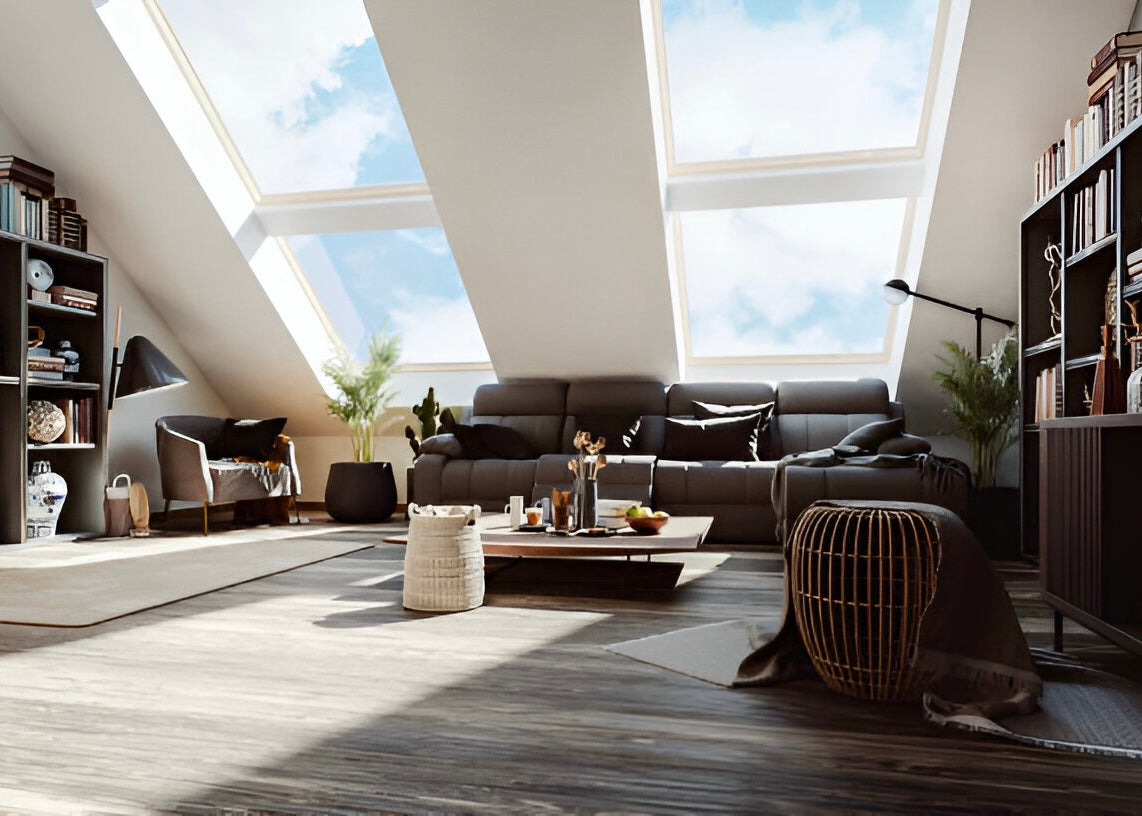
For the open living room
We need flexibility here. A track system is ideal for basic lighting as you can adapt it to parties or quiet evenings. Zone lighting is key here: an elegant arc lamp above the coffee table defines the sofa corner. Wall lights on the long walls create width. As an accent light, you can use a swiveling spot to illuminate a special picture or sculpture.
For the functional home office
Function is the main focus here. The basic lighting must be bright and free of shadows. Ensure absolutely glare-free illumination of the workplace, ideally with a pendant light directly above the desk or a high-quality desk lamp. The light color is important here: Choose neutral white light (approx. 4000 Kelvin) for concentrated work. Indirect light on the bevels reduces contrast and prevents eye fatigue.
Part 5: The 3 Cardinal Mistakes (and How to Guaranteed to Avoid Them)
This is how it becomes a masterpiece:
- Paint with light: Think of your walls and slopes as a canvas. Use “wall washing” to make them appear bright and spacious.
- Think in layers: Always combine dimmable basic lighting with targeted zone lighting and atmospheric accent lighting.
- Rely on flexibility: Adjustable spots, swiveling lights and dimmable systems are your best friends. They allow you to adjust the light to your needs.
These mistakes ruin any attic space:
- The “Inquisitor” spot: A single, rigid downlight that shines vertically downwards from the slant. It dazzles, creates harsh shadows and makes the room overall darker and lower.
- The fear of the wall: Using only ceiling lights and ignoring the walls completely. The result is flat, characterless lighting with no depth.
- One light color for everything: Using the same light color everywhere, perhaps too cold. Use warm white light (below 3000K) for coziness and neutral white (approx. 4000K) only where concentration is required.
Conclusion: Unleash the potential of your sloping roof
You see: illuminating a sloping roof is not an impossible task. It's a creative process, a chance to celebrate the unique architecture of your space rather than fight it. By understanding the psychology of light, thinking in professional terms and using the right tools cleverly, you take full control.
Stop seeing your slant as a limitation. Start viewing them as your greatest strength. You now have all the knowledge to turn a dark room into a bright, airy and inspiring living space. So, be brave, experiment and paint with light. Your home will thank you with an atmosphere that you have only dreamed of.

About the author: Robin Aebischer
As founder of BUYnBLUE and Lumoir Jewelry I share my passion for unique designs and current trends. My goal is to inspire you and help you find the right designer pieces that underline your personality and give you joy for a long time.
