
Have you bought a new lamp and want to connect it yourself, but are unsure? Don't worry! With the right instructions, connecting a ceiling or wall light is doable even for beginners. We will show you step by step how to connect a lamp safely, which cables you need to connect and what you need to pay attention to.
When moving house or after a renovation, you are often faced with the same question: How do I connect the new lamp correctly? Many people don't want to call an electrician and do the installation themselves. To avoid any nasty surprises, we explain all the important steps in this article - simply and clearly.
Why you need to be careful when connecting lamps
Electricity is not a toy! Even small mistakes can be dangerous and, in the worst case, lead to an electric shock or fire. That's why safety is the top priority. If you want to connect a lamp, you should know exactly what you are doing.
The good news: with a little know-how, the right preparation and these instructions, you can do it yourself - even as a beginner.
Which cables belong where? (Colors explained)
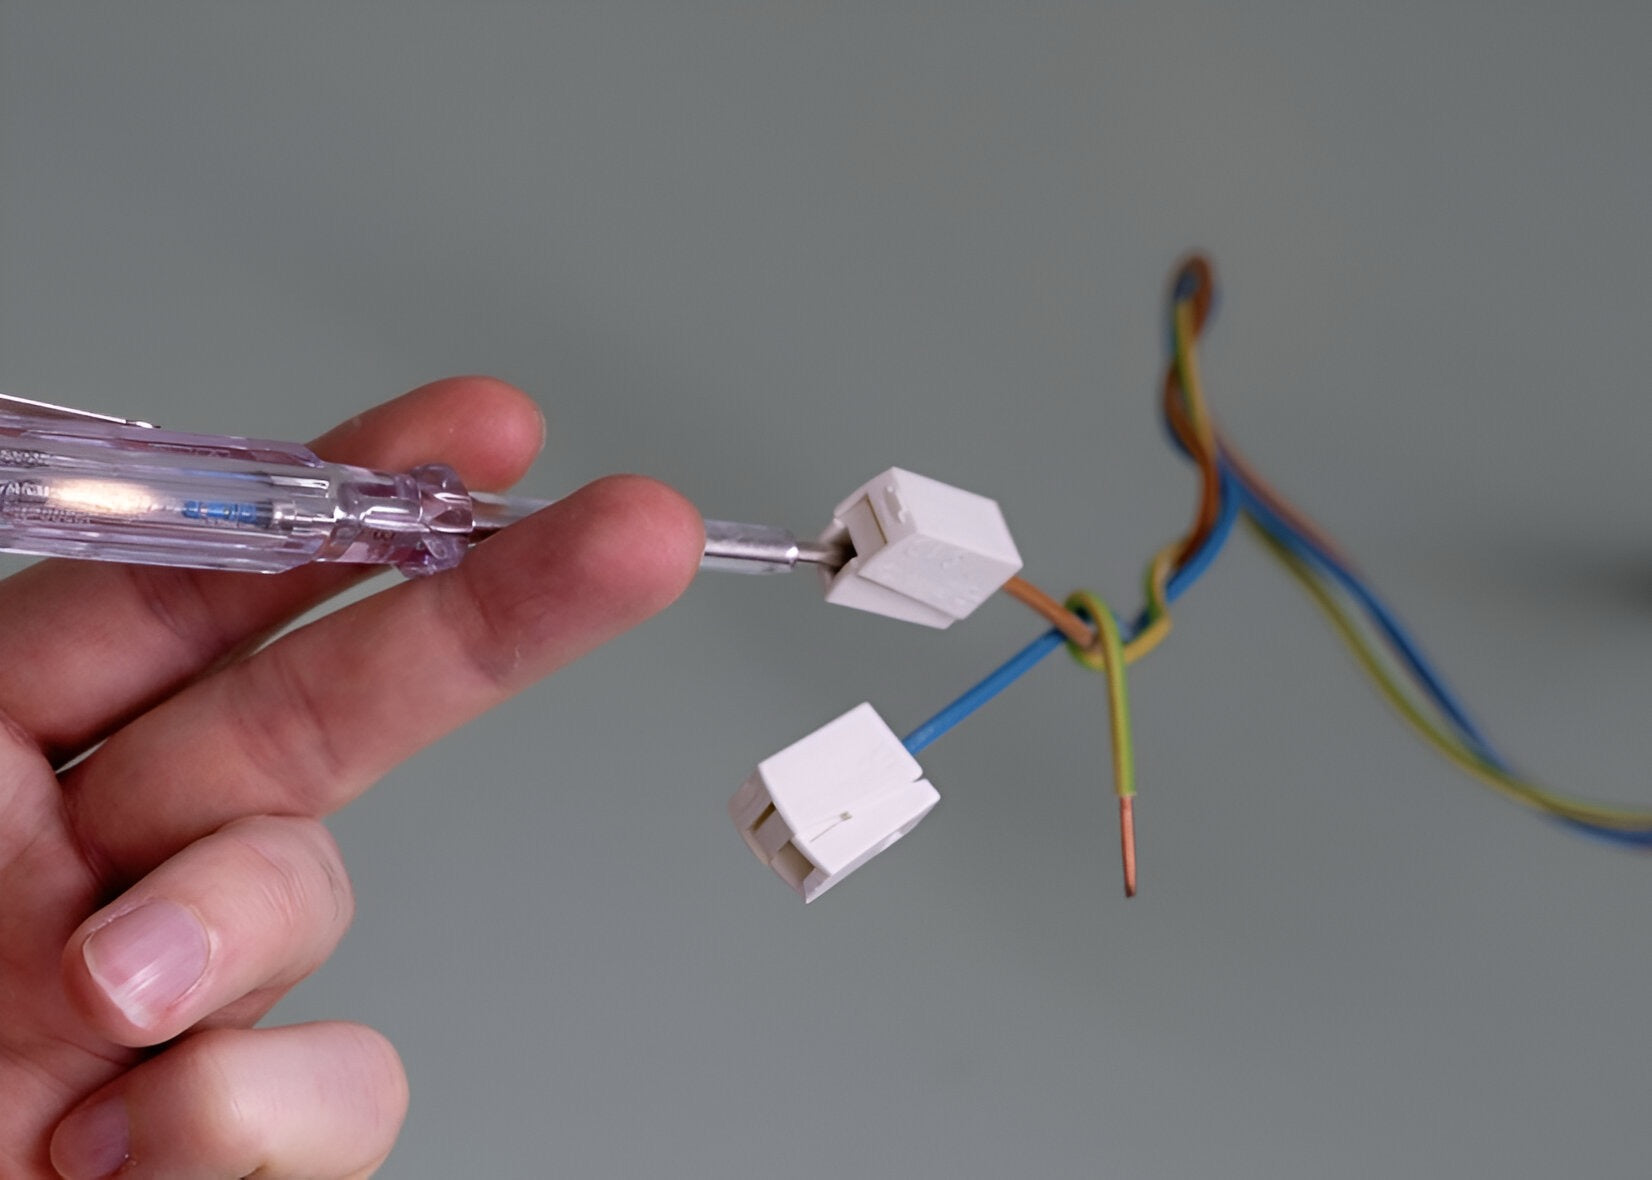
When connecting a lamp, you will almost always come across three cables. The colors will help you to connect them correctly:
- Black or brown = phase (L) → carries the current.
- Blue = neutral conductor (N) → closes the circuit.
- Yellow-green = protective earth conductor (PE) → ensures safety.
Note: Brown/black for the lamp, blue too, and yellow/green is the protection.
💡 Additional tip:
The color standards are sometimes missing in old houses. It is therefore essential to use a voltage tester before connecting cables. This will help you avoid dangerous mix-ups.
Step-by-step instructions: Connecting the lamp safely
Follow these steps if you want to connect your lamp:
1. switch off the power!
Before you start, switch off the fuse in the fuse box. Use a voltage tester to check whether there is really no more current on the line.
2. remove old lamp
Unscrew the old lamp and carefully remove the cables from the terminal. Take care not to damage the cables.
3. prepare the cable
Check the cable ends. If necessary, strip 0.5-1 cm of new insulation. Bend the ends straight so that they fit firmly into the luster terminal.
4. connect the cable correctly
Connect the cables from the lamp to the cables from the ceiling:
- Brown/black (lamp) → Brown/black (ceiling)
- Blue (lamp) → Blue (ceiling)
- Yellow-green (lamp) → Yellow-green (ceiling)
💡 Additional tip:
Use modern plug-in terminals instead of classic luster terminals. They are safer and prevent loose contacts, which can lead to flickering later on.
5. attach the lamp
Screw or clamp the lamp to the intended bracket on the ceiling or wall. Ensure a secure hold - especially with heavy models.
6. testing
Switch the power back on and check whether the lamp is working. If not: switch the fuse off again and check the cable connections.
Typical lamp connection problems - and how to solve them
Problem: Lamp does not light
➡️ Cause: Cable not connected correctly or fuse defective.
➡️ Solution: Check cable connections, check fuse.
Problem: Lamp flickers
➡️ Cause: Poor contact, loose socket or defective bulb.
➡️ Solution: Tighten the socket, insert a new bulb.
Problem: Only two cables in the ceiling
➡️ Cause: Old houses often have no protective earth conductor.
➡️ Solution: Lamp can still be connected, but pay attention to safety. If unsure: Call an electrician!
Problem: Lamp gets hot
➡️ Cause: Incorrect light source or too high wattage.
➡️ Solution: Only use the recommended wattage - preferably LEDs, as they hardly generate any heat.
Common errors when connecting a lamp
- ❌ Power not switched off - highest risk!
- ❌ Phase and neutral conductor swapped.
- ❌ Cable ends stripped too short - can slip out.
- ❌ Lamp attached to anchors that are too weak - risk of falling.
💡 Additional tip:
Mark cables with small cable clips or labels if there are several cables in the ceiling. This saves time and prevents confusion.
Safety tips for beginners
- Always switch off the power at the fuse box.
- Only use intact cables and lamps.
- Do not get your hands wet while working.
- Use insulated tools.
- If unsure: hire an electrician.
Pro tip: Connect smart lamps
If you want to install modern smart home lamps, the connection works in exactly the same way as with classic models. The difference: many smart lights offer additional functions such as dimmer, app control or color change. Make sure you have stable power cables and a good Wi-Fi signal at the installation site.
Conclusion
Connecting a lamp yourself is not that difficult if you know the basics. With the right preparation, a little care and these instructions, even beginners can do it. You save money, remain flexible and can use your new lamps immediately.
Discover matching lamps in our online store now - from modern ceiling lights to extravagant pendant lights. Our customer service team will be happy to help you if you have any questions about installation.

